Sunday, January 27, 2013

Chocolate Trifle

Last month I was asked to make one of my favorite desserts for a friend's birthday party, so I attempted to really focus on taking lots of pictures of the whole process of making this amazing trifle.  This recipe can be as easy or as difficult as you want it to be.  I'll share with you the 'cheat method' and the 'from scratch' method!  Both are delicious!


Chocolate Trifle (adapted from Paula Deen's Chocolate Toffee Trifle)

Ingredients:
1 box chocolate cake mix or one batch Mocha Chocolate Cake
1/2 cup dulce de leche, heated (or, mix 1/4 cup carmel topping with 1/4 cup sweetened condensed milk)
2 cups fudge sauce (jarred or recipe follows), warmed
2 cups heavy cream whipped and sweetened with 1/2 cup powdered sugar and 1 tsp. vanilla (you can substitute this with store bought cool whip, but there's nothing better than homemade whipped cream and it really is easy to make)
1/2 - 1 cup mini chocolate chips

Directions:
Prepare the cake according to package instructions or follow the link to the recipe for Mocha Chocolate Cake for a 9 x 12-inch pan.  Allow the cake to rest for 5 minutes.  While cake is resting, heat the dulce de leche mixture on the stove or in the microwave.  You want the mixture to be smooth and runny, so it usually take about 5 minutes on the stove.

Now, using a fork or straw, poke holes throughout the cake, but be careful not to puncture all the way to the bottom of the pan.  After poking your holes, pour the dulce de leche mixture evenly all over the cake and watch it get absorbed by the chocolate!  Allow the cake to cool completely on the counter and then cover with saran wrap and cool in the refrigerator for at least 4 hours.

Cake after the dulce de leche has cooled on the top.  You can barely see the holes in the cake.
Next, remove the cake from the refrigerator and slice it into 1 inch thick pieces (I think mine are bigger than this, then I cut them smaller at the end).  Remember, this is a dump cake, you can't mess it up and it always makes a great impression!  You will need a trifle bowl or large bowl to assemble this cake.  Now you have all of your ingredients: cooled cake cut into small pieces, heated fudge sauce and whipped cream.  The layers begin as follows: cake pieces to fill in bottom layer, 1/4 of fudge sauce, 1/3 of the whipped cream.  Continue that pattern until you run out of items or you reach the top of the trifle bowl.  Sprinkle chocolate chips on top for a beautiful presentation.  Sometimes I have leftovers so I make a mini one in a regular bowl for me and my helpers to share. . .  ;)

These are all of the ingredients ready to be assembled. 

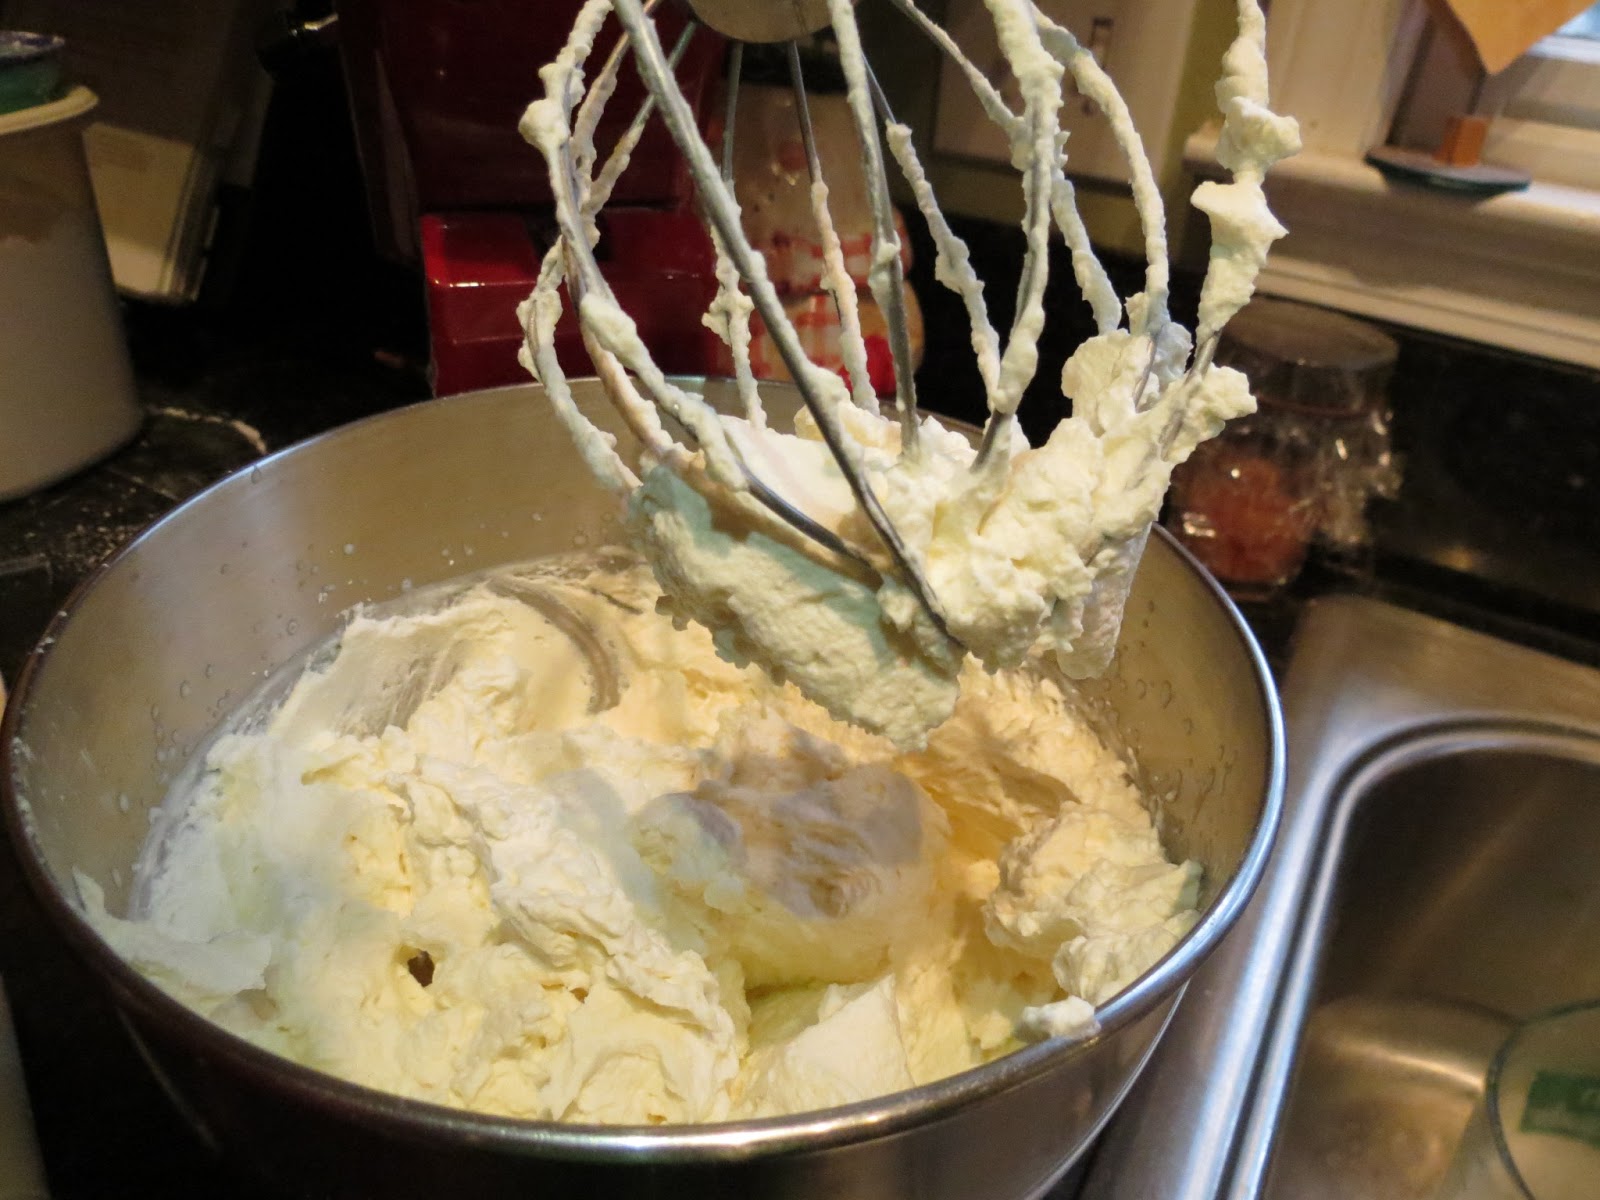
This is the homemade whipped cream.  It's so easy to make!  Seriously.  
Hot Fudge Sauce (this stuff is crazy addictive)

Ingredients:
1 4-oz bar bittersweet chocolate (I use any dark chocolate for this)
1/2 oz unsweetened chocolate (baking bars)
8 tbls butter (1 stick)
3 cups powdered sugar
1 2/3 cup evaporated milk (basically one small can)
1 1/4 tsp vanilla

Directions:
Melt the chocolate and the butter over low heat in a medium saucepan.  Turn the heat up to medium once melted.  Stir in the powdered sugar, alternating with the evaporated milk and mixing well after each addition.  Stirring constantly, bring the mixture to a simmer.  Continue cooking for 8 minutes while simmering, then remove from heat and add vanilla.  

Note: This fudge sauce is a labor or love.  It takes a long time for me to make it and I usually bump up the temperature just to a 6 on my stove just to get things moving.  So, if you're new to baking, I might just buy the fudge sauce from the store.  I promise it will still be 'to die for.'  

You see how it sticks to the spoon when the fudge sauce is done?  That's the consistency you want. It also thickens a bit upon cooling.
Yield: 10-12 servings


Week 72: Sleepovers. . .

As a parent, I must admit that I have a love/hate relationship with sleepovers.  I love them in the beginning when the kids are happily eating, playing and watching movies together.  However, the next afternoon is always challenging as they get older.  My 6-year-old, Emilie, still feels like it's SO late when she goes to bed at 9:30pm-10pm.  I enjoy sleepovers at her age.  Now, my 9-year-old stays up really late now and it makes the next day torture.  Girls are so sensitive, so she cries at the smallest annoyance or inconvenience and she's just so overtired that she can't seem to take a nap.  So, today is a sleepy day and basically a family snuggle day in order to recover from their sleepovers last night.  Praying for a very early bedtime for everyone tonight!

Here's Emilie and my sweet little niece, Josephine!  
I've been having some issues at the gym over the last week or so with dizziness and nausa, so I finally went to the doctor last week to discover the crazy stuff going on with me is the result of a double ear infection and sinus infection.  I don't think I've had an ear infection since elementary school, so I'm amazed at how much it really has messed with my equilibrium.  Bending down to get the laundry or put dishes away makes my head throb and it feels like the world is spinning.  So, I'm on antibiotics and taking a respite from the gym until I feel better doing daily chores.  The timing sucks because we were supposed to start our CrossFit challenge last week, but I couldn't complete the 'starting' workout, so I won't be able to participate in the challenge.  Maybe next year?

So, back to meal planning. . . How's the going for all of you?  It's been a struggle in my house and so has baking since we are limiting our sugar intake.  Poor me, right?

Here's the weekly menu:


Week 72 Menu

Tuesday - Leftovers
Wednesday - Roasted salmon with normandy vegetables
Thursday - Chicken with 40 cloves of garlic, roasted veggies
Friday - Grilled chicken legs, roasted sweet potatoes, broccoli
Saturday - Out to dinner

Well, have a great week everyone!

Sarah

Sunday, January 13, 2013

Week 71: Back to Meal Planning

Well, it's been quite awhile since I was able to post a meal plan, but I'm hoping that I'll get my stuff together now for the rest of the year.  It's so hard to get back into the swing of things after having everyone at home for a few weeks.  My hubby took off from 12/14 through the New Year and the kids only went back to school last Tuesday.   So, I am beginning to feel like we have a routine in our house again!  ;)
These are Paleo Chocolate Chip cookies made with almond flour!  Delicious!
I'm not much for New Year's Resolutions.  I sort of gave them up a long time ago, but I do set goals that seem more realistic to my mind.  One of my goals for this year is to curb our diet a lot more towards Paleo meals.  For those of you unfamiliar with this diet, it's a focus on lean meats, veggies and fruits.  No processed foods and also no dairy, grain, legumes).  I am doing well for dinner, but I need to make it work all day long.  We have a challenge starting at the end of January with our CrossFit gym, so we'll be eating carefully and exercising a lot during that 6-week time period.  The prizes are really awesome, so we're going to give it our best shot!

Veering away from my goals, we have a 'Go-Dairy' weekend coming up and the kids are so excited!  Alain is going out of town on a snowboarding trip with his buddies, so in an effort to make his absence 'not so sad' I told the kids we could have food that we can't eat with Daddy around (ie. wheat and dairy).  So, this is not fitting in very well with my Paleo diet, but I'll be making bread and making meals with cheese and sour cream!  Might seem lame for some of you, but this is an exciting adventure in my house!


Week 71 Menu

Sunday - Grilled chicken thighs, roasted cauliflower and carrots
Monday - Seared steak with collard greens, mushrooms and green beans
Tuesday - Leftovers
Wednesday - Roasted salmon with normandy vegetables
Thursday - Chicken enchiladas with green salsa
Friday - Beef stroganoff (special treat for our Dairy weekend)
Saturday - Out to dinner

Enjoy your week, everyone!

Sarah

Sunday, December 9, 2012

Week 70: Warm December. . .

This warm weather is creeping me out!  Seriously, it should not be 70 degrees on December 9th in North Georgia!  I am enjoying the outside time for the kids (and for my hubby who is working on our deck), but it just feels strange to see people wearing flip-flops in December.  Ok, enough of my soap box and onto the menu. . .  ;)

Thai Basil Shrimp with red peppers and cabbage!  Sent this picture to Alain to lure him home last week!  

We finally bought our Christmas tree today and decorated it, so it was a sweet family night for all of us.  The kids proceeded to pay with legos as soon as the decorating was complete and I made some oatmeal chocolate chip cookies for a special treat!  I've been using coconut oil in these cookies rather than butter and they are delicious!  It's really interesting that they seem to hold their shape better with the coconut oil rather than spreading out on the cookie sheet to be a bit thinner when I use butter.  Not sure if any of you have tried it, but I'd love to hear from you want to share your thoughts!


Week 70 Menu

Sunday - Rotisserie chicken, green beans, white rice
Monday - Leftovers
Tuesday - Pot roast, carrots, potatoes
Wednesday - Chicken Cacciatore, pasta, zucchini pasta, roasted cauliflower
Thursday - Shrimp tacos, white rice, black beans, cabbage slaw (romaine lettuce for Paleo taco shells)
Friday - Roasted salmon with normandy vegetables
Saturday - Out to dinner

Hope you all have a great week!

Sarah

Sunday, December 2, 2012

Week 69: Playing Catch Up!

Well, I totally missed posting last week's menu with my post-Thanksgiving craziness.  My SIL came into town to visit her sister (who had pre-eclampsia and delivered a preemie a few weeks ago) with my niece, so we had a little time with my sweet niece, Josephine (Zach calls her 'JosePine' and I love it).  The 'no-menu' weeks are always a challenge, but we did almost totally Paleo meals all week despite the chaos.


Now this picture is not a Paleo meal, but I made these right before Thanksgiving and I was thrilled with this pita bread recipe!  It was the easiest bread I've made and the kids devoured this stuff as it came out of the oven.  I cooked it in the oven on a cookie sheet turned upside down and they only take a few minutes to puff up and cook!  Pita bread was a really fun recipe to make with the kids, so give it a try if you like pita bread.  They are SO much better than anything you get in the store!


Week 69 Menu

Sunday - Rotisserie chicken, broccoli (from our garden)
Monday - Mexican beef (or lettuce wraps), roasted cauliflower, guacamole
Tuesday - Spaghetti with meat sauce, green beans, zucchini noodles
Wednesday - Leftovers
Thursday - Thai basil shrimp, cabbage, red peppers, white rice
Friday - Grilled steaks, spring mix salad, grilled asparagus
Saturday - Roasted salmon with normandy vegetables

Happy cooking!

Sarah

Wednesday, November 14, 2012

Easy Rustic Bread

This bread has been all over pinterest, so if you are all fans, then you've probably seen it before!  Truly, this bread is amazing and it's the easiest bread I've ever made!  You have to try it at least once and leave a comment to let me know how it works out!


Easy Rustic Bread
(original recipe: Simply So Good blog)

3 cups unbleached All-Purpose flour
1 3/4 tsp. salt
1/2 tsp. rapid rise yeast or bread machine yeast (same thing)
1 1/2 cups warm water

Find a very large mixing bowl and whisk together the flour, salt and yeast.  Add water and mix gently until the mixture starts to come together.  It will still be quite wet.  Cover the bowl with plastic wrap and leave on the counter for 12-15 hours (you can leave it up to 24 hours, but don't put it in the refrigerator).  After the allotted time, heat the oven to 450 degrees and place the pot with lid on inside the oven for 30 minutes.  A cast iron pot works really well for this, but you can use any pot that can go inside your oven safely.  I used a stainless steel pan and lid last time and it turned our fantastic!  So, while the oven is pre-heating, pour the dough onto a heavily floured surface and attempt to shape it into a ball.  It will still be soft.  Cover the dough with the plastic wrap while you wait for the pot to pre-heat.  After 30 minutes, remove lid and drop dough into the middle of the pot and return the lid.  Cook for 30 minutes.  When the timer goes off, take lid off of the pot and return to the oven to bake for 15 minutes.  Finally, remove the bread from the oven and place it on a cooling rack.  It will be hard to wait to dig into this bread and I'll be honest, I usually don't wait more than 10 minutes.  Just be careful because it is very hot!


The original recipe has a ton of FAQ's and they cover any question you could possibly imagine!  Check it out if you need some guidance.  You'll also find a great selection of mix-in options on the original site.  I have not yet experimented with mix-ins because the basic bread is just SO amazing!

Hope you enjoy!

Sarah

Fudge Brownies

I know I have a few brownie recipes on this blog, but can you really have too many brownie recipes?  These are my go-to brownies right now because they are easy!  You an give or take the instant coffee powder, but I always prefer to use it if I have it on hand.


Fudge Brownies (adapted from King Arthur Flour)

Ingredients:
4 large eggs
1 1/4 cups Special Dark Cocoa or Dutch-process cocoa
1 teaspoon salt
1 teaspoon baking powder
1 teaspoon espresso powder or instant coffee powder (Starbucks VIA are yummy)
1 tablespoon vanilla extract
1 cup (2 sticks) unsalted butter
2 1/4 cups sugar
1 1/2 cups King Arthur Unbleached All-Purpose Flour or White Whole Wheat Flour
2 cups chocolate chips

Directions:
Preheat the oven to 350°F. Lightly grease a 9" x 13" pan.  Crack the 4 eggs into a large bowl, and beat them together.  Next, add cocoa, salt, baking powder, espresso powder, and vanilla and mix untill the batter is velvety smooth.

In a medium-sized microwave-safe bowl, melt the butter by slicing it into tablespoons and placing it in the bowl.  It should take about 1 minute to melt.  Next, add the sugar and stir to combine. Continue to  microwave briefly, just until the mixture is hot (about 110°F to 120°F), but not bubbling; it'll become shiny looking as you stir it. King Arthur Flour claims that heating the mixture to this point will dissolve more of the sugar, which will yield a shiny top crust on your brownies.  Add the hot butter/sugar mixture to the egg/cocoa mixture pouring slowly into the bowl, stirring until smooth.  Add the flour and chips.

Spoon the batter into a lightly greased 9" x 13" pan.  Bake the brownies for about 30 minutes, until a cake tester inserted into the center comes out clean, or with just a few moist crumbs clinging to it. The brownies should feel set on the edges, and the center should look very moist, but not uncooked. Remove them from the oven and cool on a rack before cutting and serving.